Setting up a Raspberry Pi SSH tunnel proxy can unlock powerful networking capabilities for both hobbyists and professionals. Whether you're looking to secure your internet connection, bypass geographical restrictions, or enhance remote access, this versatile tool is indispensable. This article dives deep into the world of Raspberry Pi SSH tunnel proxies, offering practical advice, troubleshooting tips, and expert insights to help you get the most out of your setup. From configuring the hardware to fine-tuning the software, we'll cover everything you need to know to harness the full potential of your Raspberry Pi SSH tunnel proxy.
Understanding the basics of Raspberry Pi SSH tunnel proxy is crucial before diving into advanced configurations. At its core, an SSH tunnel acts as a secure channel between your device and a remote server, encrypting all data transmitted through it. This is particularly useful for protecting sensitive information when connecting to unsecured networks or accessing restricted content. By leveraging the power of Raspberry Pi, you can create a portable, cost-effective solution that fits seamlessly into your digital infrastructure.
As more individuals seek ways to enhance their cybersecurity and optimize their networking setups, Raspberry Pi SSH tunnel proxies have emerged as a popular choice. This guide will walk you through the process step by step, ensuring that even beginners can achieve professional-grade results. With clear instructions, detailed explanations, and actionable tips, you'll be able to set up and maintain a reliable Raspberry Pi SSH tunnel proxy in no time.
Read also:Debunking The Myth Are Burmese Pythons Venomous
What Is a Raspberry Pi SSH Tunnel Proxy?
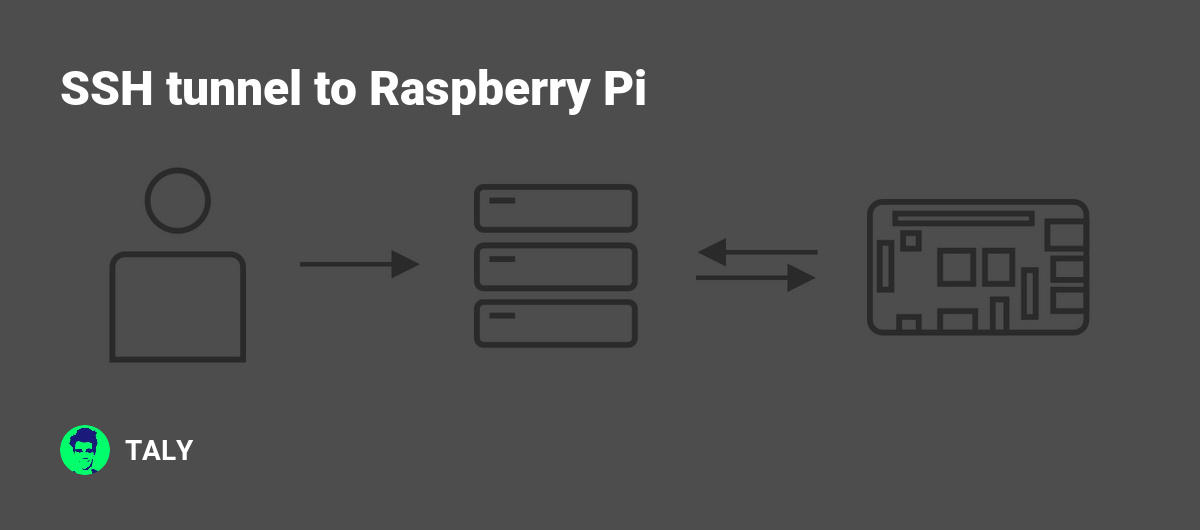
A Raspberry Pi SSH tunnel proxy is essentially a small, low-power computer configured to act as a secure gateway for your internet traffic. By establishing an SSH tunnel, you can encrypt your data and route it through a remote server, enhancing both privacy and security. This setup is particularly beneficial for users who frequently connect to public Wi-Fi networks or need to bypass geo-restrictions.
To better understand how this works, imagine sending sensitive information over an unsecured network. Without encryption, your data could be intercepted by malicious actors. However, with a Raspberry Pi SSH tunnel proxy, your data is encrypted before it leaves your device, making it nearly impossible for anyone to access it without the proper credentials.
Why Should You Use Raspberry Pi SSH Tunnel Proxy?
There are several compelling reasons to consider using a Raspberry Pi SSH tunnel proxy. First and foremost, it offers robust security features that protect your data from prying eyes. Additionally, it allows you to access blocked websites and services, making it ideal for travelers or individuals living in regions with strict internet regulations. Furthermore, the Raspberry Pi's affordability and compact size make it an attractive option for those looking to implement a DIY networking solution.
- Enhanced Security
- Access Restricted Content
- Cost-Effective Solution
How Does Raspberry Pi SSH Tunnel Proxy Work?
The process begins with configuring your Raspberry Pi to act as an SSH server. Once this is done, you can establish an SSH tunnel from your client device to the Raspberry Pi. This tunnel encrypts all data transmitted between the two devices, ensuring that your information remains secure. From there, you can route your internet traffic through the Raspberry Pi, effectively creating a proxy server that shields your online activity from external threats.
Can Raspberry Pi Handle SSH Tunnel Proxy Tasks Efficiently?
Yes, Raspberry Pi is more than capable of handling SSH tunnel proxy tasks efficiently. Thanks to its powerful hardware and lightweight operating systems, the Raspberry Pi can manage multiple connections simultaneously without compromising performance. However, it's important to note that the efficiency of your setup will depend on factors such as the model of Raspberry Pi you're using and the specific configuration of your SSH tunnel.
Is Raspberry Pi SSH Tunnel Proxy Easy to Set Up?
Setting up a Raspberry Pi SSH tunnel proxy is relatively straightforward, especially if you're familiar with basic Linux commands and networking concepts. The process involves installing the necessary software, configuring the SSH server, and establishing the tunnel. While it may seem daunting at first, following a step-by-step guide like this one will make the task much more manageable.
Read also:Lyn Aldens Journey The Inspiring Story Of A Renowned Investment Analyst
What Are the Requirements for Setting Up Raspberry Pi SSH Tunnel Proxy?
Before you begin setting up your Raspberry Pi SSH tunnel proxy, ensure you have the following:
- A Raspberry Pi (any model with at least 1GB RAM)
- A microSD card with a compatible operating system installed
- An Ethernet cable or Wi-Fi adapter for internet connectivity
- A power supply for your Raspberry Pi
- A computer or laptop to configure the Raspberry Pi
Step-by-Step Guide to Setting Up Raspberry Pi SSH Tunnel Proxy
Now that you have a basic understanding of what a Raspberry Pi SSH tunnel proxy is and why you should use it, let's dive into the setup process. Follow these steps carefully to ensure a successful installation:
- Install a compatible operating system on your Raspberry Pi.
- Enable SSH on your Raspberry Pi by creating an empty file named "ssh" on the boot partition.
- Connect your Raspberry Pi to the internet and determine its IP address.
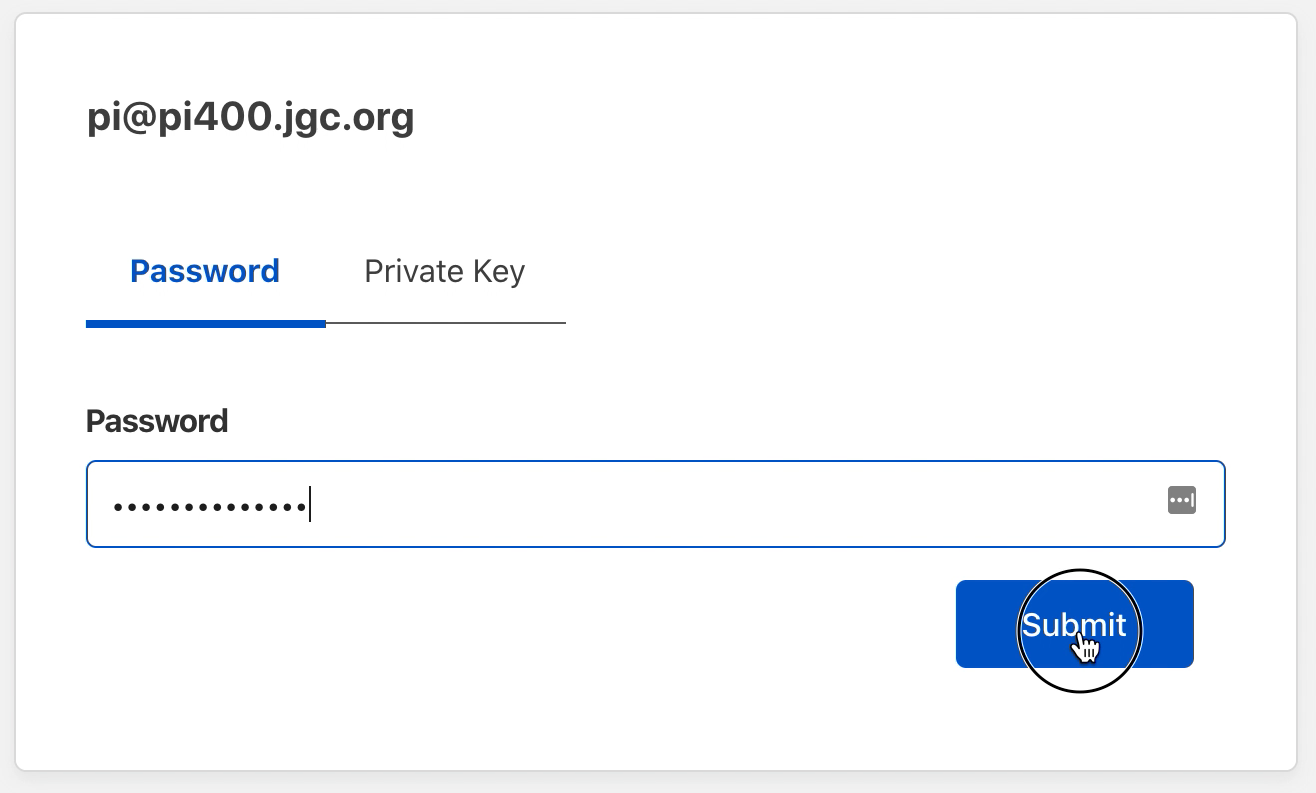
- From your client device, open a terminal window and enter the SSH command to connect to your Raspberry Pi.
- Configure the SSH tunnel by specifying the necessary parameters, such as local and remote ports.
- Test the connection to ensure everything is working as expected.
How Do You Troubleshoot Raspberry Pi SSH Tunnel Proxy Issues?
Despite following the setup instructions carefully, you may encounter issues with your Raspberry Pi SSH tunnel proxy. Common problems include connection timeouts, authentication failures, and misconfigured settings. To troubleshoot these issues:
- Check that SSH is enabled on your Raspberry Pi.
- Verify the IP address and port number used in the SSH command.
- Ensure that your firewall or router settings are not blocking the connection.
- Review the SSH configuration file for any errors or inconsistencies.
What Are the Best Practices for Using Raspberry Pi SSH Tunnel Proxy?
To maximize the effectiveness of your Raspberry Pi SSH tunnel proxy, adhere to the following best practices:
- Use strong passwords and enable two-factor authentication for added security.
- Regularly update your Raspberry Pi's software to patch vulnerabilities and improve performance.
- Avoid overloading the Raspberry Pi with too many simultaneous connections, as this can degrade performance.
- Monitor your internet traffic to ensure that all data is being routed through the SSH tunnel.
Is Raspberry Pi SSH Tunnel Proxy Legal?
Using a Raspberry Pi SSH tunnel proxy is generally legal, provided that you comply with local laws and regulations. It's important to note that while SSH tunnels can be used to bypass geo-restrictions, they should not be employed for illegal activities such as copyright infringement or unauthorized access to restricted content. Always ensure that your actions align with the legal framework in your jurisdiction.
Can Raspberry Pi SSH Tunnel Proxy Be Used for Commercial Purposes?
Yes, Raspberry Pi SSH tunnel proxies can be used for commercial purposes, but certain considerations must be taken into account. For instance, if you plan to offer this service to clients, you'll need to ensure that your setup can handle the expected load and provide reliable performance. Additionally, you may need to comply with data protection regulations, depending on the nature of your business.
What Are the Potential Limitations of Raspberry Pi SSH Tunnel Proxy?
While Raspberry Pi SSH tunnel proxies offer numerous advantages, they do come with some limitations. These include:
- Performance may be affected by the Raspberry Pi's hardware capabilities.
- Setting up and maintaining the proxy requires a certain level of technical knowledge.
- Some networks may block SSH connections, rendering the tunnel ineffective.
Conclusion: Unlock the Potential of Your Raspberry Pi SSH Tunnel Proxy
With the right knowledge and tools, a Raspberry Pi SSH tunnel proxy can become an invaluable asset in your networking arsenal. By following the steps outlined in this guide, you can create a secure, efficient, and cost-effective solution that meets your specific needs. Remember to adhere to best practices, stay informed about potential limitations, and always ensure that your actions remain within the bounds of the law.
Table of Contents
- What Is a Raspberry Pi SSH Tunnel Proxy?
- Why Should You Use Raspberry Pi SSH Tunnel Proxy?
- How Does Raspberry Pi SSH Tunnel Proxy Work?
- Can Raspberry Pi Handle SSH Tunnel Proxy Tasks Efficiently?
- Is Raspberry Pi SSH Tunnel Proxy Easy to Set Up?
- What Are the Requirements for Setting Up Raspberry Pi SSH Tunnel Proxy?
- Step-by-Step Guide to Setting Up Raspberry Pi SSH Tunnel Proxy
- How Do You Troubleshoot Raspberry Pi SSH Tunnel Proxy Issues?
- What Are the Best Practices for Using Raspberry Pi SSH Tunnel Proxy?
- Is Raspberry Pi SSH Tunnel Proxy Legal?